How to Cut Acrylic on a CNC Router?
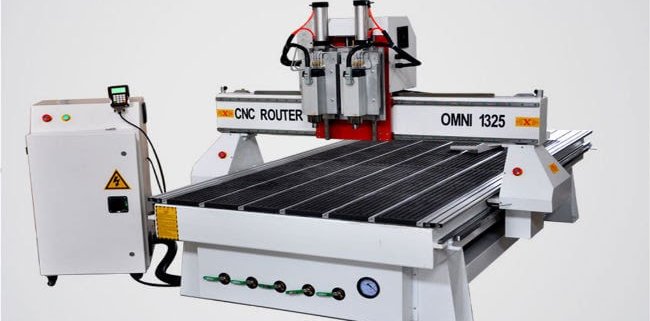
A CNC router is an advanced computer-controlled machine that performs the job of cutting, drilling & milling materials of various types. Being an alternative to hand-held routers, the CNC router’s primary functions are to efficiently cut, engrave & curve objects exquisitely.
By automating routing, the errors can be reduced drastically. Depending upon the components, the CNC routers are compatible with different types of hard materials, including stone, glass, acrylics, foam, plastics, metal, and more.
Some upgraded routing machines come with a dust collection system that soaks in material chips and other categories of waste during the process.
The computer controlled routers are aimed to lower the frequency of manufacturing errors and reduce production time and create near-identical objects.
Read on this article, as we discuss how a CNC router cuts acrylic:-
The best thing about a CNC routing machine is that it can cut & engrave a variety of materials, besides wood. For instance, acrylics are the most popular used material for producing decorative materials and sign making, therefore, a CNC router manufactured by OMNI CNC can achieve that.
Picking the Right Acrylic
With various types of acrylic variations in the market, in terms of colors, sizes & shapes, the first step is to decide on the type of acrylic you want to work on.
Cast acrylic is most recommended as it is easy to cut through compared to extruded acrylic.
Clear acrylic, on the other hand, is light in weight, shatterproof, and can be used to produce unique pieces of art.
Picking the Right Bit
Once you’ve decided on the acrylic to cut, the next step is to decide on the right bit. It depends on what your expectations are.
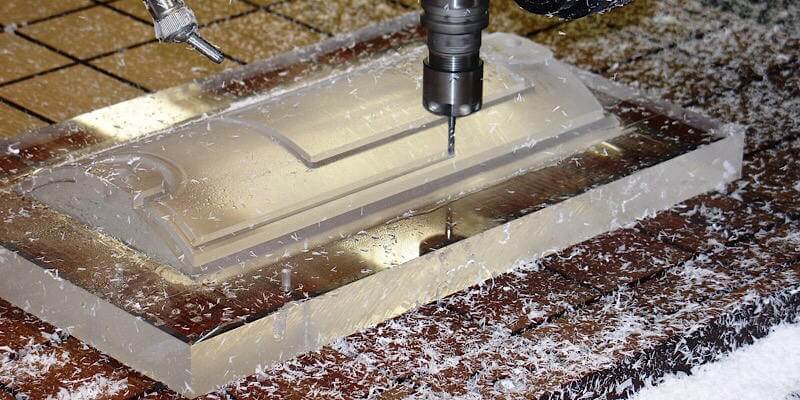
A 1/4-inch solid carbide O-flute is the most preferred choice for cutting acrylic. It has the advantage of preventing the plastic chips from accumulating inside the curve of the cut.
The 60° engraving bit is the right choice for V-carving. It comes with a flat edge that delivers better edge quality in comparison to several other types of bits.
Pick Acrylic Cutting Software
Now, you need the right software for cutting acrylic. The latest software enables 2D, 2.5D & 3D engraving, and comes with the best-in-industry feature you require to design, regardless of what your imagination is.
Choose software that allows you to draw & edit both the original designs or customize the ready-made templates.
The customization options include profiling, pocketing, drilling, fluting, texturing, auto-inlays, and so much more.
Step-by-Step Guide on Cutting Acrylics
Now, when you’ve chosen the acrylic, bit, and design, begin with cutting acrylic.
Step 1:- First things first, you’ve to set the feed rate according to the bit size. The most recommended range is between 75-300 IPM. High feed rates work best with large-sized bits. Smaller bits need a lower feed rate.
Step 2:- In this step, you’ve to set the RPM. The recommended value is 18,000 RPM for optimizing the spindle’s ability to cut through the acrylics, without melting the acrylics.
Step 3:- In the third step, you’ve to set the cutting depth. Experts suggest that cutting depth must be 1/2 of the diameter of the bit. It prevents the bits from breaking.
Step 4:- In the fourth step, you’ve to begin cutting with a ramp. You can select the option within the software. Opting for ramping rather than plunging is to deter distortion
Step 5:- Now, you’ve to secure the acrylic material on the CNC router table.
Step 6:- Finally, run the CNC router for cutting acrylic in a design you want.
Post Processing the Acrylics
Once you’ve achieved the desired precision, it is indispensable to polish & grind the machined acrylic parts. It is done consecutively with the polishing tools with a linen towel and a smaller grit, and finally, polishing paste.
Besides this, there are chemical polishing methods under which gas of a special type is poured over the acrylic to melt the outer layer. And, finally, an exotic diamond tool for lending finishing touches.
A Word of Caution
One of the troubles associated with a CNC router is that acrylic heats up because of friction. It causes the acrylic edges to melt and bonds after you cut through. You can minimize this issue by increasing the IPM so that bits and plastic are not in contact longer. When cutting acrylics, you need not be reckless, be patient and steadily cut through to maintain control.
Still if you have problems with acrylic re-bonding because of heat, the best thing you can do is put the acrylic in the freezer for an hour or two. So, the starting temperature would be lower, and bending issues will be managed to a great extent. You can also opt for a cool mister time-to-time both on the blade and the plastic.
Final Words
Omni CNC is committed to helping you get the desired results from a CNC router for cutting acrylics. By following the above procedure step-by-step, you’ll have the best results with a nice finish. Contact us to discuss your router needs.
Finally, at Omni CNC, we design & manufacture the finest-quality CNC cutting machines to help you increase the production capabilities, save time and money by reducing manual errors.
Our high-speed routing machines work with both metal and non-metal while delivering a smooth finish. We assure you the most affordable prices in the market, without compromising on the quality.
To know more about how our best CNC routers work or any doubts, connect with our sales team at +86-531-89003210/ 85938856 or Inbox your question at sales@omni-cnc.com we are ready to serve you the best. One of our representatives will reach out to you as soon as possible.


